Blurring: How and Why
2010, Dr. Lawlor, CS
481/681, CS, UAF
The basic idea in blurring is to get rid of the high-spatial-frequency detail in an image; a "low-pass" filter. See the fourier transform discussion here for what I mean by high and low frequencies (small and large details in an image).
The way blurring gets rid of small details is by averaging them with
nearby pixels--because nearby pixels will have the same overall low
frequency colors, but different details, the details get averaged away
but the low frequencies remain.
You can implement blurring in many different ways:
- Change the mipmap LOD bias:
glTexParameterf(GL_TEXTURE_2D,GL_TEXTURE_MIN_LOD,2.7);. This will
make the mipmapping hardware include additional blurring by
artificially shifting mipmap levels. Clearly, this only works if
you've built mipmaps for your texture.
- Draw a few copies of the image slightly shifted from one another,
carefully adjusting the alpha each time so the copies end up equally
weighted onscreen--surprisingly, the alpha values you need are 1.0,
then 1.0/2, then 1.0/3, then 1.0/4, etc.
- Read a few nearby pixels ("filter taps") in a GLSL pixel shader,
and average them together in a single shader pass. This is a
little faster than the multipass method, and it's easier to write and
expand to do other processing, so it's what I usually do. (Of
course, that doesn't mean it's the best!)
- Read a whole bunch of nearby pixels, and weight them by a Gaussian curve to get Gaussian blur.
This is the default blur performed by most image editing programs,
although it's not totally clear why folks choose this.
One curious result of the central limit theorem:
(almost) any blurring technique results in a Gaussian blur when applied
repeatedly (same image blurred over and over again). This is good, because it means we can just repeatedly
apply a cheap lumpy blur (with few taps) to get results similar to a
high-quality blur (with exponentially more taps).
Given both original and blurred images, you can subtract the two to
find just the image details (the high frequencies alone). This is
useful for several interesting tasks, including HDR Tone Mapping. You can even mix high and low frequencies from different images for a hideous effect.
Tons of physical phenomena can be represented as a blurring process:
- Heat diffuses through uniform materials, with a small sharp hot region blurring out into a large fuzzy warm zone.
- Light diffuses through translucent materials like wax or milk.
- Chemical signals diffuse through growing tissue, directing the growth of that same tissue.
However, in addition to blurring most cool physics also involves some
additional reaction. For example, you can get cool crystalline
patterns by just making ice formation release heat, and letting the
heat diffuse out.
Blurring for Bloom
One common rendering use of blurring is to "bloom" bright light sources.
For example, here's an image of the "sun" behind a gnarled tree, with a
blue sky. It doesn't read as the sun at all, because the sun
isn't just white, it's BLINDINGLY white!
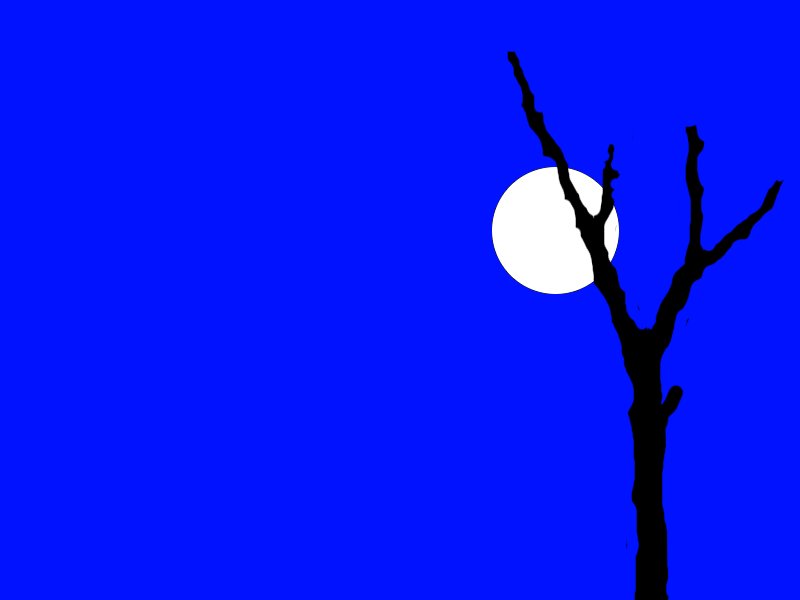
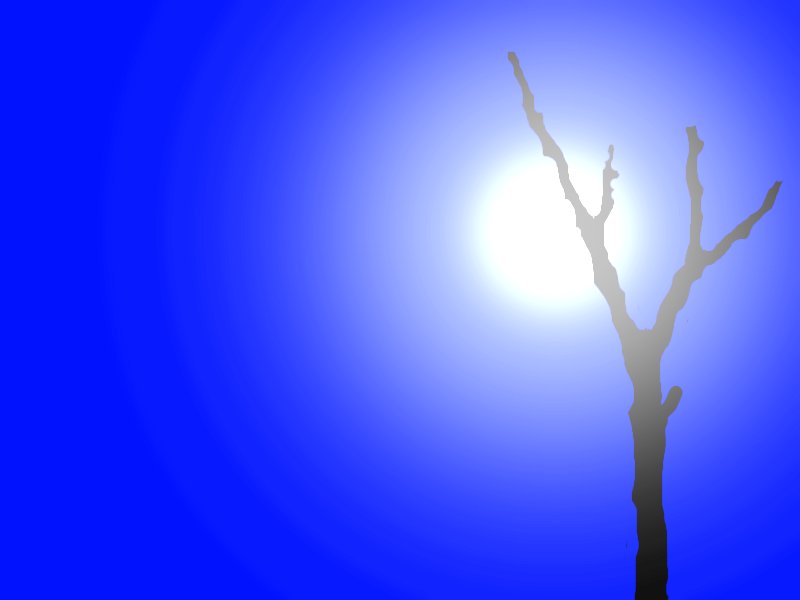
If anything, this looks more like the moon. Now add some
bloom--the white spreads out from the sun, covering the whole
scene. We're simulating the fact that really bright lights will
actually scatter off the vitreous humour in your eye, and so light up areas beyond where they'd normally focus.
This image makes me want to squint, because your eye expects the pain of looking at the sun!
Typical rendering approach:
- Render a low-resolution, dark version of the scene to a bloom
texture. The resolution doesn't need to be very high, because
we'll blur the thing anyway. Some darkening (adjusting the
radiance scale factor) limits bloom to only the brightest light sources.
- Render the normal resolution, normal brightness version of the scene.
- Draw a screen-filling quad, where each pixel gently blends in a
blurred version of the bloom texture. You only need a very tiny
amount of bloom, unless you're going for a soft-focus effect.