
Dr. Orion Lawlor, 2011-10-12
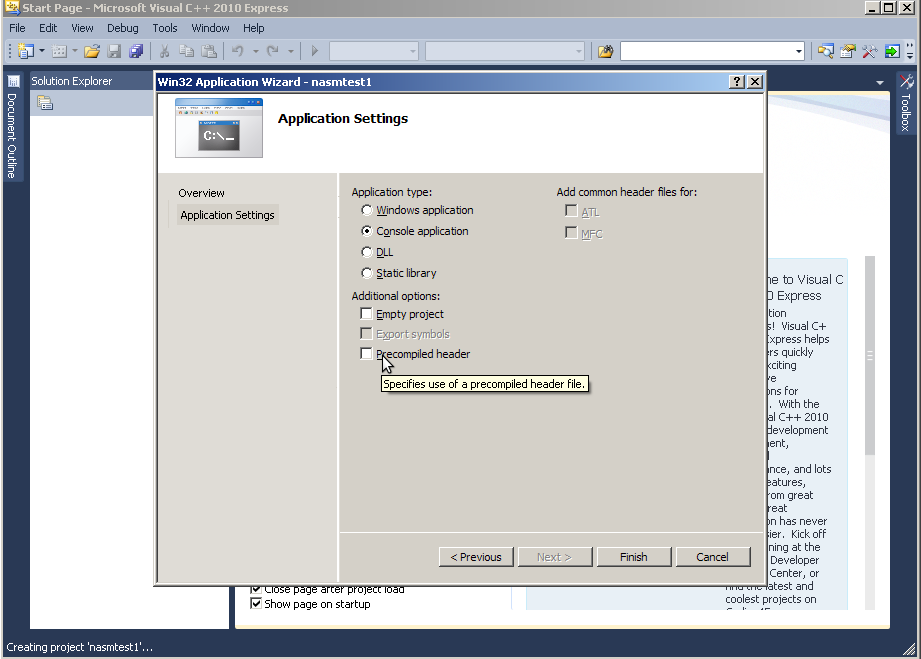
First, hit File - New Project to make a standard C++ console application:
Next, remove the Microsoft junk, like the procompiled header.
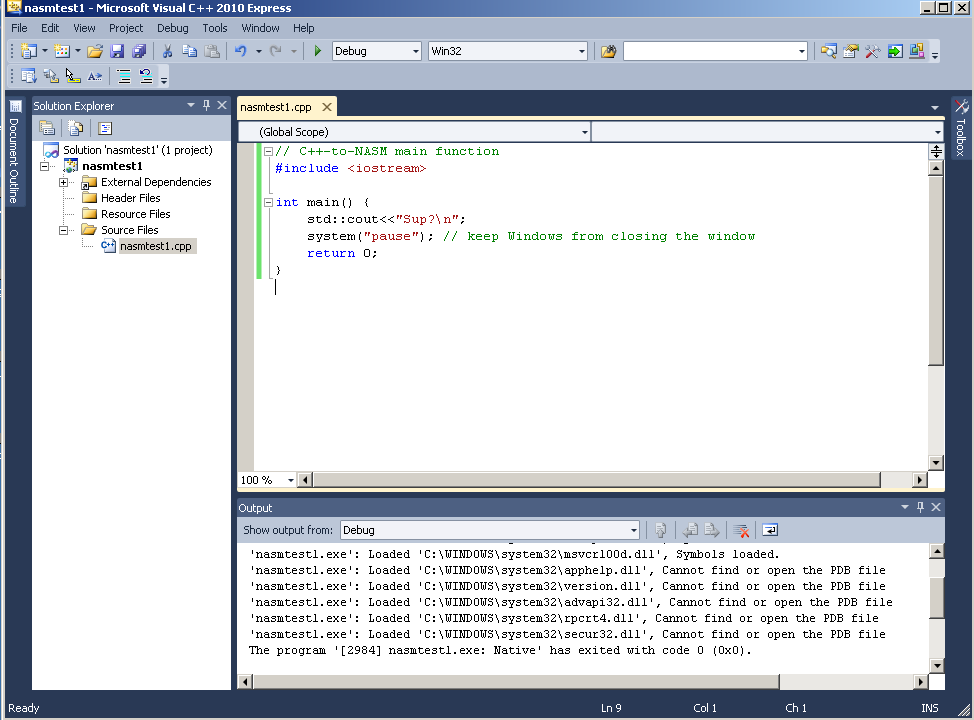
Next, write some test C++ code. It helps to run at this point, to make sure everything works.
Now write an assembly language source file with these critical pieces:
 Visual
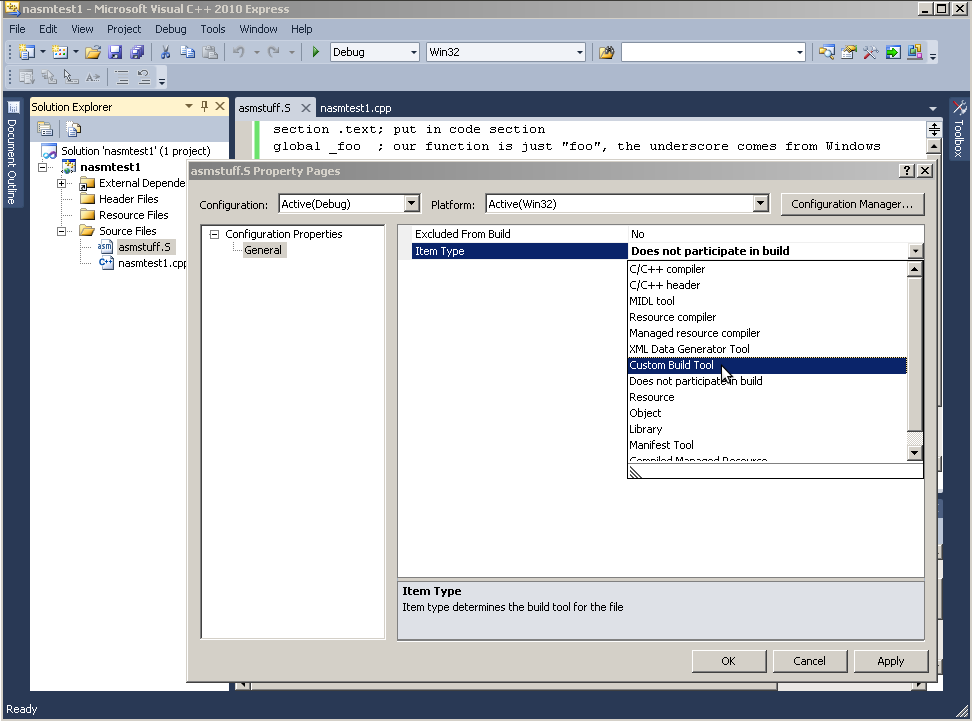
doesn't know how to compile the .S file by default, so it ignores it:
"Does not participate in build." Change this to "Custom Build Tool":
Visual
doesn't know how to compile the .S file by default, so it ignores it:
"Does not participate in build." Change this to "Custom Build Tool":
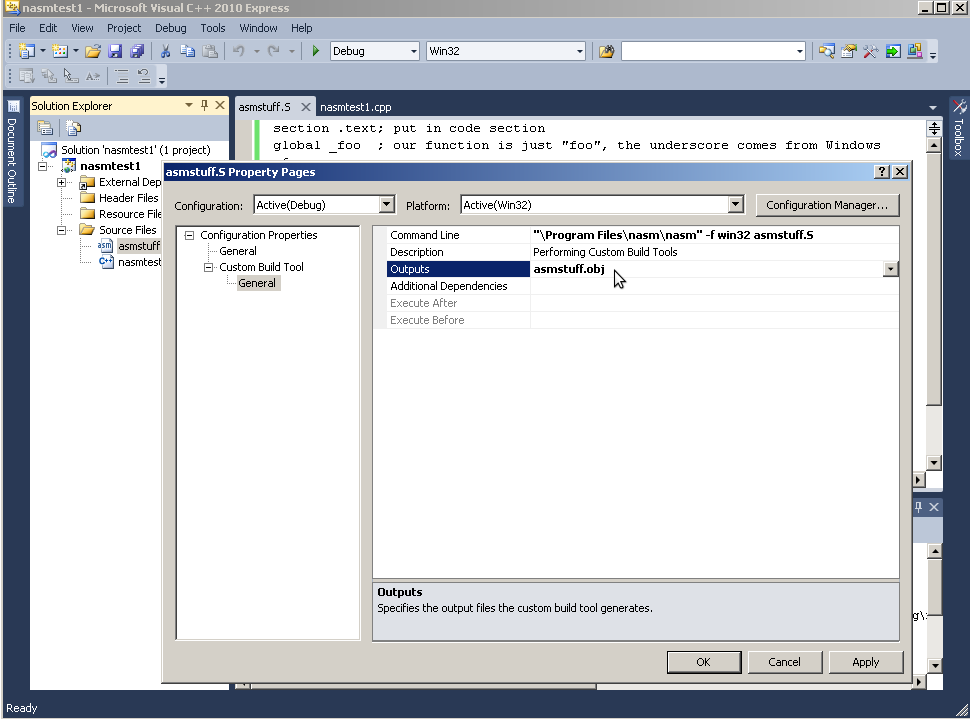
 Now you need to download and install NASM (or YASM, etc.) You then give Visual Studio the Command Line needed to run your assembler, just like at the DOS prompt:
"\Program Files\nasm\nasm" -f win32 asmstuff.SThe assembler will output a .obj file, which you list under "Outputs".
Build the project, and you should be able to call assembly functions from your C++, and vice versa! Don't forget extern "C" from C++!
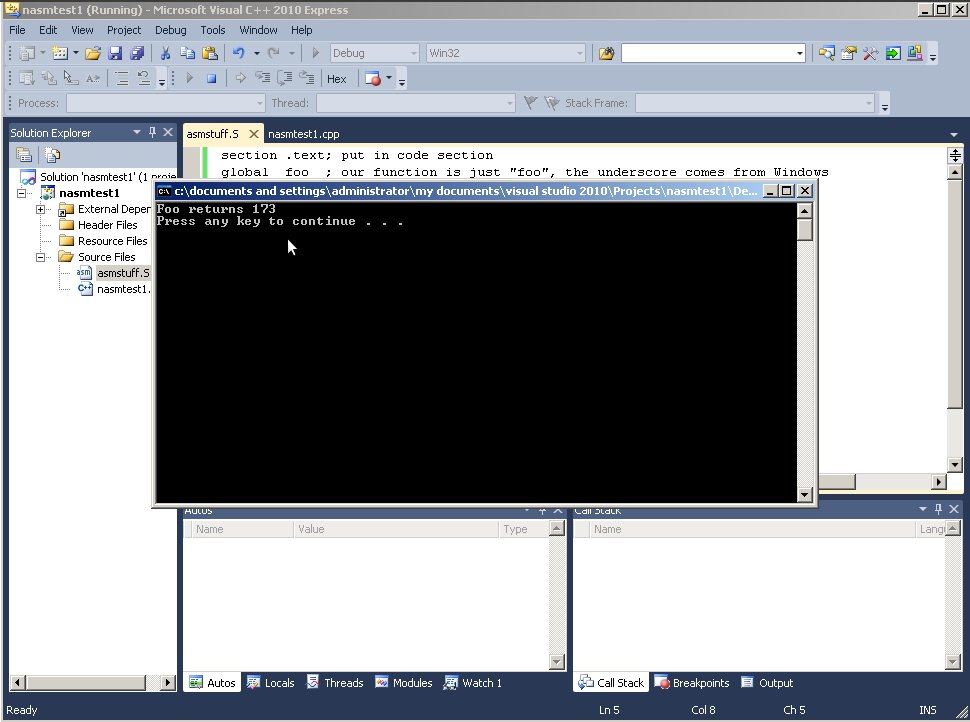
Simple C++ code:
#include <iostream>
extern "C" int foo(void); // written in assembly!

int main() {
	std::cout<<"Foo returns "<<foo()<<"\n";
	system("pause");
	return 0;
}
Assembly code:
section .text ; makes this executable
global _foo ; makes this visible to linker
_foo:
	mov eax,7 ; just return a constant
	ret